
'%3e%3cpath%20d='m24.7018129.03888403%2011.2778281%206.67879663-.0181821%2013.56348904-11.259646%206.6606051-6.6844666-3.9709902%2011.6514714-6.541272v-5.8973849l-4.7471673-2.60470586-6.8895427-3.93711399'%20fill='%230095d3'/%3e%3cpath%20d='m11.3313965.03888403-11.277828%206.67879663.01818205%2013.56348904%2011.25964595%206.6606051%206.6852924-3.9717138-10.66220196-6.5405484v-5.8973849l10.67797726-6.54221107'%20fill='%23f38b00'/%3e%3cpath%20d='m18.017374%2022.9708988-6.5183252-3.998915%206.5222007-3.8447451%206.9298332%203.951391'%20fill='%23004b70'/%3e%3cpath%20d='m18.0314053%203.98921729-6.5046536%203.98442963%206.5172421%203.88418548%206.8619013-3.93951296'%20fill='%2398441e'/%3e%3c/g%3e%3c/svg%3e)
Reactive Forms with Clarity UI and Angular
Clarity is a design system for building great user interfaces. The Clarity Design System is constructed and maintained by the Clarity Design team at VMware and is open source. Clarity has an extensive suite of robust Angular Components that we can use to quickly prototype and build our applications.
In this post, we will learn how to use Clarity with Angular to build a login form that looks great, as well cover accessibility and user experience best practices. Let's get started.
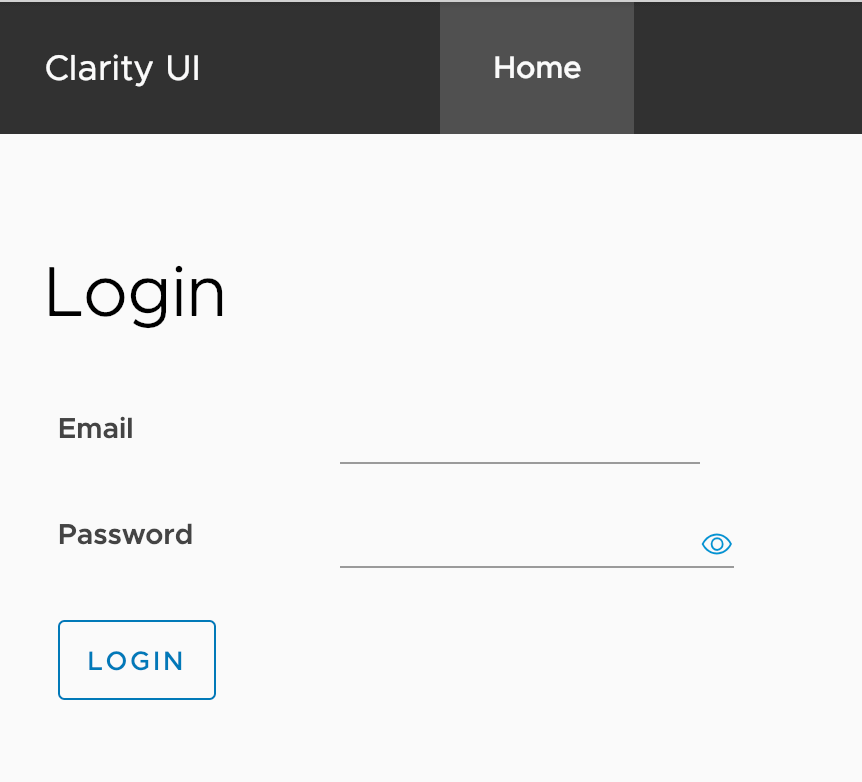
In this tutorial we will create a simple login form that looks something like the following:
Our Angular application will be a standard Angular CLI app. With the Angular CLI, we can use schematics to add or automatically add code with a few commands. Clarity has a schematic that with a simple command will install and add everything we need to our application to get started using Clarity. To create an Angular project that uses Clarity we can run the following:
ng new my-app

cd my-app

ng add @clr/angular
The ng add @clr/angular command installs Clarity via NPM as well as adds the imports into our Angular app needed to start using Clarity out of the box. Now that we have our application set up we need to hook up the Angular Forms package.
In this example we will use the Angular Reactive Forms library as it has many advantages over the typical template based approaches. To use the Reactive Forms library we need to add it to our AppModule as seen below:
import { NgModule } from '@angular/core';
import { BrowserModule } from '@angular/platform-browser';
import { BrowserAnimationsModule } from '@angular/platform-browser/animations';
import { ReactiveFormsModule } from '@angular/forms';
import { ClarityModule } from '@clr/angular';

import { AppComponent } from './app.component';

@NgModule({
  imports: [
    BrowserModule,
    BrowserAnimationsModule,
    ReactiveFormsModule,
    ClarityModule
  ],
  declarations: [AppComponent, LoginComponent],
  bootstrap: [AppComponent]
})
export class AppModule {}
Now that we have Clarity and Angular's Reactive Form Module installed we can start building out our login form.
Form Builder Service
First, we need to declare our form in our login component. Let's take a look at the login.component.ts.
import { Component } from '@angular/core';
import { FormBuilder, FormGroup, Validators } from '@angular/forms';

@Component({
  selector: 'app-login',
  templateUrl: './login.component.html',
  styleUrls: ['./login.component.css']
})
export class LoginComponent {
  form: FormGroup;

  constructor(private formBuilder: FormBuilder) {
    // create our form group with all the inputs we will be using in the template
    this.form = this.formBuilder.group({
      email: ['', [Validators.required, Validators.email]],
      password: ['', Validators.required]
    });
  }

  submit() {
    if (this.form.valid) {
      console.log(this.form.value);
    }
  }
}
In our login component, we inject a special Angular service called the FormBuilder. The FormBuilder service allows us to easily create forms with multiple inputs and assign validation rules to each input. This service will enable us to keep our validation logic in the TypeScript instead of our templates. To create our form lets take a closer look at the constructor.
constructor(private formBuilder: FormBuilder) {
  this.form = this.formBuilder.group({
    email: ['', [Validators.required, Validators.email]],
    password: ['', Validators.required]
  });
}
In the constructor we assign our form property to the return value of the group() method on the formBuilder service. This service method will instantiate our form group object. In our group, we are defining two inputs, email, and password. The names of these properties will be referenced in our template so Angular can know which validators should be applied to which inputs.
email: ['', [Validators.required, Validators.email]];Each input has an array of parameters. The first value in the array is an initial value you would like to assign to your input. The second value is one to many validators we would like Angular to apply to that input. For our email use case, we will use the built-in Angular validators to make sure the user has added a value to the email input and that it is a valid email address.
submit() {
  if (this.form.valid) {
    console.log(this.form.value);
  }
}
The last part of our login component is a simple method that will be called when the form is submitted. If the form is valid and the validators pass, then we log the form values.
Next, we need to add the HTML to create our form. In the template is where Clarity and its form utilities will help us quickly create a form with good accessibility as well as user experience.
Clarity Form Components
In our login component template, we will use several Clarity components and directives to construct our login form. First, let's create our form.
<h1>Login</h1>

<form clrForm [formGroup]="form" (ngSubmit)="submit()">
  <!-- Clarity Inputs will be here -->
  <button class="btn">Login</button>
</form>
Our login form is a typical Reactive Form. We bind the form element to our form instance we defined in our TypeScript with the [formGroup]="form" binding. We also listen for any submit events with the custom (ngSubmit) event. This event will fire if the user uses the enter key to submit the form or click a button without a type="button" attribute.
Next, we need to add our inputs to our template and bind them to our form instance. First, let's add the email input.
<h1>Login</h1>
<form clrForm [formGroup]="form" (ngSubmit)="submit()">
<clr-input-container>
<label>Email</label>
<input clrInput formControlName="email" type="email" />
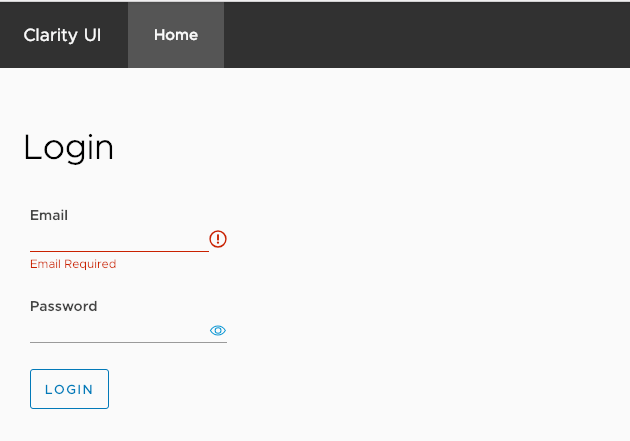
<clr-control-error *clrIfError="required">Email Required</clr-control-error>
</clr-input-container>
<button class="btn">Login</button>
</form>Clarity provides several components and directives to make it easy to create forms that are accessible and have good UX. The clr-input-container component is a special wrapper component that wires up layout, accessibility and validation logic for the input. For example, our label does not have a for attribute that associates itself to our input. Typically we would do this for accessibility, but the clr-input-container will generate this code for us automatically. If we look at the generated output in the browser we will see the following:
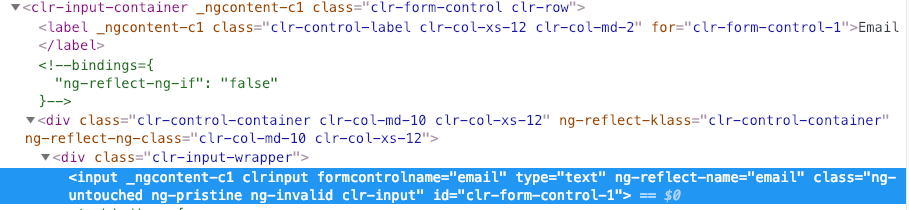
As we can see the input and label have an associated id and for attribute.Now screen readers can interpret this input as well as focus the input if the user clicks the label.
The clr-input-container also helps apply layout styles that work with the clr-control-error component. This component automatically will show our error message if that particular validation error is applied to the input. This further reduces the amount of code we would normally have in our templates. Lastly, we have a clrInput directive that applies the appropriate Clarity CSS classes to the input as well as provides the hooks needed for the validation and layout logic.
Now if we look at our input and trigger validation we can see the following:
Lastly, we need to add our Password input to our component template.
<h1>Login</h1>

<form clrForm [formGroup]="form" (ngSubmit)="submit()">
  <clr-input-container>
    <label>Email</label>
    <input clrInput formControlName="email" type="email" />
    <clr-control-error *clrIfError="required">Email Required</clr-control-error>
  </clr-input-container>

  <clr-password-container>
    <label>Password</label>
    <input clrPassword formControlName="password" type="password" />
    <clr-control-error *clrIfError="required"
      >Password Required</clr-control-error
    >
  </clr-password-container>

  <button class="btn">Login</button>
</form>
Similar to our email input we use the Clarity components and directives but now use the clrPassword directive. This directive adds some additional functionality such as the reveal icon next to the password input.
Clarity is a full design system for enterprise applications and can greatly increase productivity when building out Angular applications. Check out the documentation and the working demo below!


%20--%3e)
%20--%3e)
