

Next-Gen Apps with the Clarity Design System and Blazor
The .NET Blazor Framework enables client-side web apps to be written using the .NET framework and C#. Blazor leverages Web Assembly (WASM) to compile C# to run in the browser. Blazor enables fantastic developer experience and tooling that developers are accustomed to the .NET world. Using next-gen Design Systems like the Clarity Design System, we can quickly build out modern UIs.
The Clarity Design System is built stability and compatibility of any UI framework by leveraging Custom Elements. This enables Clarity Components to be treated as any HTML element and work in any frontend web framework while only maintaining a single code base.
In this post, we will learn how to get started with Blazor and install the Clarity Design System. We will also cover the tradeoffs with Blazor and other mainstream frontend frameworks available today.
Blazor Setup
To start using Blazor, ensure you have the latest .NET environment installed locally. Clone the starter example repository for this blog post.
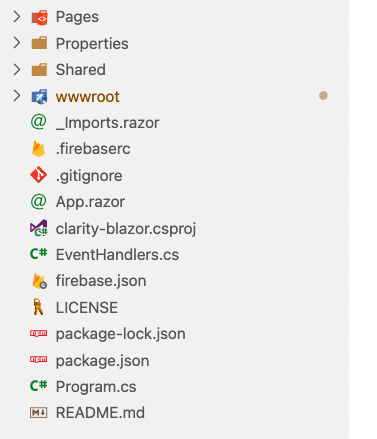
git clone [email protected]:coryrylan/clarity-blazor.gitOnce cloned, you should open the repo and see the Blazor project with a package.json file at the root.
If you don't already install NodeJS. Once installed, run the following commands in the root of the repository,
npm install
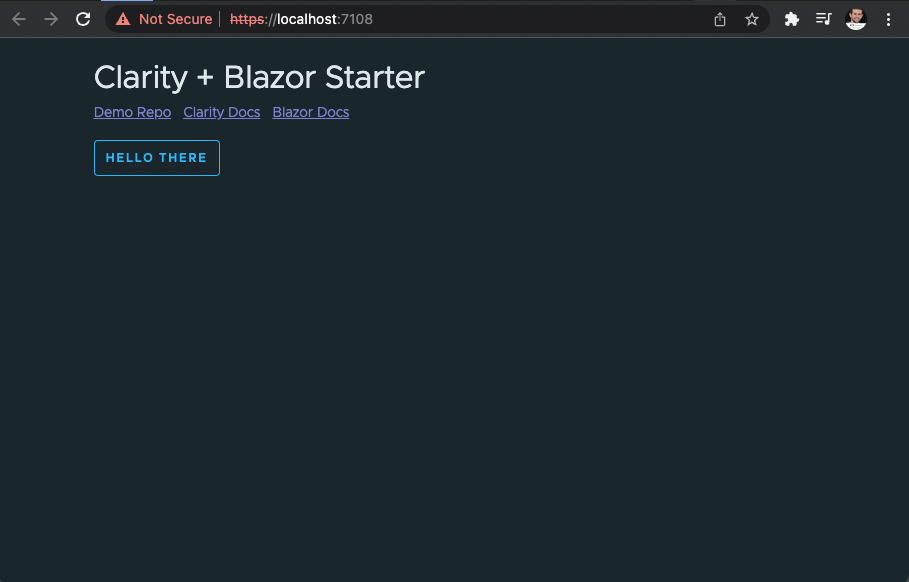
npm run startThese commands will install our project's frontend dependencies and run the start npm/node script in the package.json file. Alternatively, you can run dotnet watch. If everything is installed correctly, you should see your localhost webserver.
Install Clarity
This repo already has everything in place to use Clarity with Blazor. So let's walk through the steps it took to get everything in place. First, open the wwwroot/index.html file.
<!DOCTYPE html>
<html lang="en">
<head>
  <meta charset="utf-8" />
  <meta name="viewport" content="width=device-width, initial-scale=1.0, maximum-scale=1.0, user-scalable=no" />
  <title>clarity-blazor</title>
  <base href="/" />
  <link rel="stylesheet" href="https://unpkg.com/[email protected]/modern-normalize.css">
  <link rel="stylesheet" href="https://unpkg.com/@cds/[email protected]/global.min.css">
  <link rel="stylesheet" href="https://unpkg.com/@cds/[email protected]/styles/theme.dark.min.css">
  <link rel="stylesheet" href="https://unpkg.com/@cds/[email protected]/css/bundles/default.min.css">
  <link href="css/app.css" rel="stylesheet" />
</head>

<body cds-text="body" cds-theme="dark">
  <div id="app">
    <div id="blazor-loading-ui" cds-text="section">Loading...</div>
  </div>

  <script src="_framework/blazor.webassembly.js"></script>
  <script type="module" src="js/event-handlers.js"></script>
  <script type="module" src="js/index.js"></script>
</body>

</html>
The index.html file is the root template for your Blazor application. To keep installation simple, we are using direct CDN links to Clarity. Blazor and Clarity can use any bundler tool such as Webpack or Rollup.
We add the main global style sheets for Clarity, including a mild CSS reset and the optional dark theme.
<link rel="stylesheet" href="https://unpkg.com/[email protected]/modern-normalize.css">
<link rel="stylesheet" href="https://unpkg.com/@cds/[email protected]/global.min.css">
<link rel="stylesheet" href="https://unpkg.com/@cds/[email protected]/styles/theme.dark.min.css">
<link rel="stylesheet" href="https://unpkg.com/@cds/[email protected]/css/bundles/default.min.css">
Once added, open the wwwroot/js/index.js file.
import('https://cdn.skypack.dev/pin/@cds/[email protected]/mode=imports,min/optimized/@cds/core/button/register.js');
import('https://cdn.skypack.dev/pin/@cds/[email protected]/mode=imports,min/optimized/@cds/core/alert/register.js');
The index.js file is a plain JavaScript file loaded into the index.html. Again, to keep things simple and focus on Blazor, we are loading this via CDN but could use a bundler of our choice.
Now that the Clarity components and CSS are loaded for our application let's look at our first Blazor component.
Blazor Components and Razor Views
Blazor enables views to be authored using the .razor syntax commonly used in .NET web applications. This provides excellent developer experience when writing in C#. In this repo, we have one view, Pages/Index.razor.
Razor views render plain HTML and can have a @code block to attach any view logic to the template. In this view we have the following snippet,
<cds-button @onclick="@(e => Show = !Show)" action="outline" status="primary">Hello There</cds-button>

<cds-alert-group status="info" hidden="@(!Show)">
  <cds-alert>
    General Kenobi, you are a bold one...
  </cds-alert>
</cds-alert-group>
@code {
private bool Show = false;
}We can bind and listen to HTML events via the @ symbol in our razor view. For example, on our Clarity cds-button, we listen to the click event via @onclick and then pass an expression to evaluate.
We can also set attributes on our elements. For example, we can toggle the hidden attribute on the alert component by binding it to the Show property. With the event and attribute binding, we can now toggle our alert box.
At this point, everything should be working in your demo application. However, to better understand how things were set up, keep reading!
Blazor and Custom Events
Up to now, Blazor has been pretty straightforward. We can use C# and Razor views to render HTML. We can listen to events and manipulate DOM based on the component state. However, there is a gap with Blazor currently when listening to HTML Custom Events that needs to be addressed.
Custom Events are an event type that HTML elements can emit in the DOM. Blazor is aware of the default event types such as click, hover, etc. However, if a component uses a Custom Event, we need to let Blazor know those events exist and to listen to them.
We can register our events with two files. First open the EventHanders.cs file.
/*
 * EventHandlers.cs
 * Generated with https://github.com/coryrylan/custom-element-types
 */
using Microsoft.AspNetCore.Components;
using System.Text.Json;

namespace clarity_blazor;

[EventHandler("oncloseChange", typeof(CustomEventArgs))] // cds-dropdown, cds-modal, cds-internal-overlay, cds-internal-popup
[EventHandler("onexpandedChange", typeof(CustomEventArgs))] // cds-navigation-group, cds-navigation, cds-tree-item
[EventHandler("onselectedChange", typeof(CustomEventArgs))] //
public static class EventHandlers
{

}

public class CustomEventArgs : EventArgs
{
  public dynamic? Detail { get; set; }

  /* Returns the detail value of CustomEvent with given type */
  public T GetDetail<T>() {
    return JsonSerializer.Deserialize<T>(Detail); // used to cast dynamic type, unknown until event occurs at runtime
  }
}
This file was generated using the custom-element-types tool, taking a custom element library and generating type bindings for various frameworks. We can create and register all the custom events needed for the Clarity Design System with this tool.
This enables the Custom Events to be recognized by Blazor and the Razor views. Unfortunately, Blazor only listens to events at the global document level. This means we can't associate a given Custom Event to a given HTML Element similar to other frameworks like Angular and React with TSX. This limits us on providing static types for specific event/element combinations.
The second file to register our events is the wwwroot/js/event-handlers.js file. This file was linked in our root index.html file and also generated with the custom-element-types tool.
/**
 * wwwroot/custom-events.js
 * Generated with https://github.com/coryrylan/custom-element-types
 */

 const customEvents = {
  closeChange: true, // cds-dropdown, cds-modal, cds-internal-overlay, cds-internal-popup,
  expandedChange: true, // cds-navigation-group, cds-navigation, cds-tree-item,
  selectedChange: true, //
};

/**
 * Workaround: Blazor ignores the event target and only listens to global events
 * this is a problem for most custom elements which dispatch CustomEvent types
 * that default to not bubbling.
 */
CustomEvent = class Bubbled extends CustomEvent {
  constructor(event, config) {
    const bubbles = customEvents[event] !== undefined ? customEvents[event] : config.bubbles;
    super(event, { ...config, bubbles });
  }
}

Object.keys(customEvents).map(event => {
  Blazor.registerCustomEventType(event, {
    browserEventName: event,
    createEventArgs: event => {
      return { detail: event.detail };
    }
  });
});
While the previous file registered the events, it only did so on the C# side of our code views. Therefore, we must call the Blazor.registerCustomEventType API to enable the event listeners on the JavaScript compatibility layer of Blazor. Once called for each event, Blazor will understand the Custom Events for our entire application.
Blazor and Event Bubbling
Unfortunately, Blazor only supports events that bubble in the DOM in its current state. Blazor does not add event listeners to individual elements but a single listener at the root of the DOM, expecting that all events emitted bubble. This creates a pretty significant compatibility issue with most UI components on the Web. For Web Components and many frameworks exported components, they use Custom Events which, by default, do not bubble. Many frameworks choose not to bubble to limit the number of events that an app would need to filter through.
Because of this limitation in Blazor, your UI framework/library likely won't work with Blazor. However, until this is fixed in Blazor, you can work around it by a not-so-great patch of the CustomEvent class.
/**
 * Workaround: Blazor ignores the event target and only listens to global events
 * this is a problem for most custom elements which dispatch CustomEvent types
 * that default to not bubbling.
 */
CustomEvent = class Bubbled extends CustomEvent {
  constructor(event, config) {
    const bubbles = customEvents[event] !== undefined ? customEvents[event] : config.bubbles;
    super(event, { ...config, bubbles });
  }
}
In the event-handlers.js file, this workaround was generated by the custom-element-types tool. The patch will set any matching name of a Custom Event from our library to bubble by default so Blazor will hear the event.
While this is a rough spot for Blazor, it can be handled with the custom-element-types generator for now.
Blazor is still in its early days, but it's impressive to see the ability to leverage .NET and C# in the browser with WASM. With Blazor and Web Components, teams will have the flexibility to build out Web UI with the great tooling from the .NET ecosystem. Make sure to check out the link to the working demo below!


%20--%3e)
%20--%3e)
'%3e%3cpath%20d='m24.7018129.03888403%2011.2778281%206.67879663-.0181821%2013.56348904-11.259646%206.6606051-6.6844666-3.9709902%2011.6514714-6.541272v-5.8973849l-4.7471673-2.60470586-6.8895427-3.93711399'%20fill='%230095d3'/%3e%3cpath%20d='m11.3313965.03888403-11.277828%206.67879663.01818205%2013.56348904%2011.25964595%206.6606051%206.6852924-3.9717138-10.66220196-6.5405484v-5.8973849l10.67797726-6.54221107'%20fill='%23f38b00'/%3e%3cpath%20d='m18.017374%2022.9708988-6.5183252-3.998915%206.5222007-3.8447451%206.9298332%203.951391'%20fill='%23004b70'/%3e%3cpath%20d='m18.0314053%203.98921729-6.5046536%203.98442963%206.5172421%203.88418548%206.8619013-3.93951296'%20fill='%2398441e'/%3e%3c/g%3e%3c/svg%3e)