
'%3e%3cpath%20d='m24.7018129.03888403%2011.2778281%206.67879663-.0181821%2013.56348904-11.259646%206.6606051-6.6844666-3.9709902%2011.6514714-6.541272v-5.8973849l-4.7471673-2.60470586-6.8895427-3.93711399'%20fill='%230095d3'/%3e%3cpath%20d='m11.3313965.03888403-11.277828%206.67879663.01818205%2013.56348904%2011.25964595%206.6606051%206.6852924-3.9717138-10.66220196-6.5405484v-5.8973849l10.67797726-6.54221107'%20fill='%23f38b00'/%3e%3cpath%20d='m18.017374%2022.9708988-6.5183252-3.998915%206.5222007-3.8447451%206.9298332%203.951391'%20fill='%23004b70'/%3e%3cpath%20d='m18.0314053%203.98921729-6.5046536%203.98442963%206.5172421%203.88418548%206.8619013-3.93951296'%20fill='%2398441e'/%3e%3c/g%3e%3c/svg%3e)
Static Sites with Hugo and Clarity Design
The Hugo static site generator is a fantastic tool for building static Web pages with plain HTML/CSS and JavaScript. Hugo is written in the Go programming language with fast compilation times and a flexible templating API. Static site generators are great for sites with content that does not update frequently or need to be as fresh as possible. Static site generators generate plain HTML typically from markdown content that can be deployed to static CDNs. These tools work well for documentation or blog-type websites.
This post will show how to set up Hugo with the Clarity Design System. The Clarity Design System is a set of robust UI components and design guidelines to build out enterprise-ready UI in any tech stack.
Getting Started with Hugo
First, to get started, clone the starter repo I have created here Hugo + Clarity Starter.
git clone [email protected]:coryrylan/clarity-hugo.gitOnce created, open the directory in your editor of choice. First, we need to install Hugo,
brew install hugoOnce installed, we need to install NodeJS if not yet installed. While Hugo is written in Go, this project does use NodeJS to run a few small build processes. So to install our project folder, run the following,
npm installNow that we have both Hugo and Node installed, we can start our project by running,
npm startIf everything worked as expected, you should see a starter demo page like this,
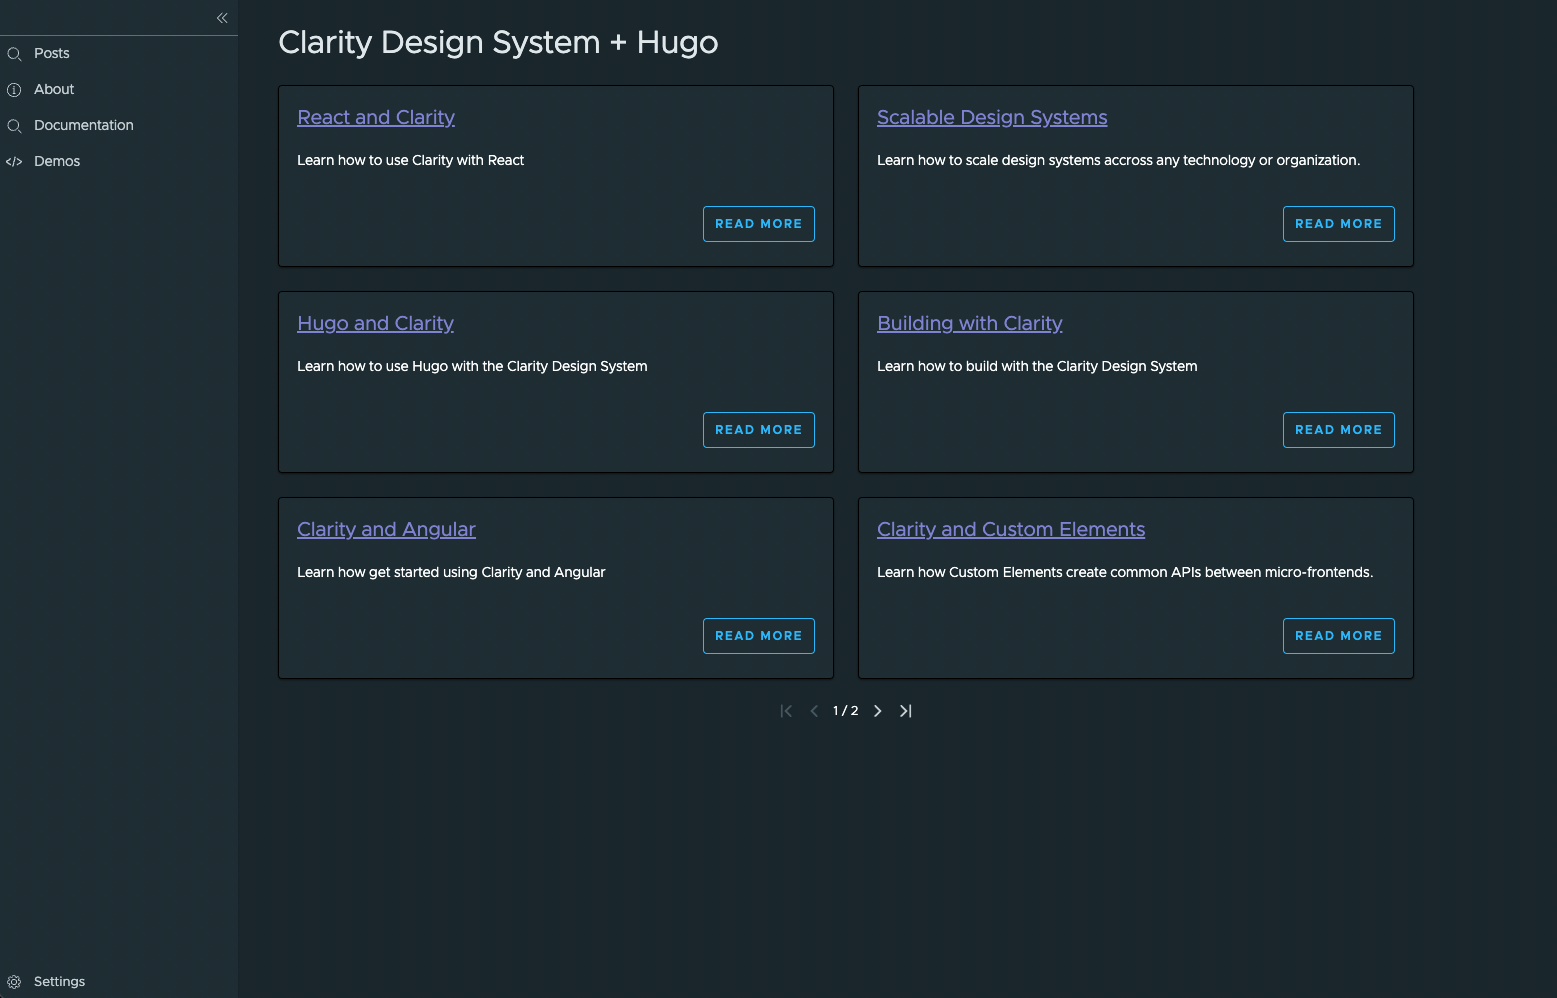
Now that we have the project running, let's walk through what is needed to set up Clarity.
Setup JavaScript
Since Clarity is a set of UI Web Components, its assets are just plain CSS and JavaScript. This makes it very flexible in many different build environments. In addition, by default, Hugo has a build process pipeline (Hugo Pipes), making it easy to start importing third-party code as needed.
In the layouts/_defaults/baseof.html file we have our top most root template for our website. In this template we have our CSS and JavaScript imports for code that will be loaded for each page of our site. At the bottom of the template near the body tag we have the following,
{- $options := dict "targetPath" "js/bundle.js" -}
{- $jsBundle := resources.Get "index.js" | js.Build $options | resources.Minify | fingerprint -}
<script src="{ $jsBundle.RelPermalink }" integrity="{ $jsBundle.Data.Integrity }" defer></script>
This syntax is the Hugo Pipes that allows us to import JavaScript into our site. Hugo's pipeline will build and minify our JavaScript when we build for production. Under the hood, Hugo is processing this JavaScript through ESBuild, ensuring that the code is "tree-shaken" or removing any unused JavaScript from our final bundle.
Now, if we look at our assets/inde.js file, we can look at what code in importing the Clarity components.
In the index.js file, you will see the component imports from the Clarity Design System. When importing a component, we import it via the register import, which will import and register the Web Component to the DOM. This import ensures only the components you use will be loaded onto your webpage.
import '@cds/core/button/register.js';Similar to components, icons are imported individually, so only the icons needed for your web page are loaded rather than the almost 500 icons the library provides.
import { ClarityIcons } from '@cds/core/icon/icon.service.js';
import { infoStandardIcon } from '@cds/core/icon/shapes/info-standard.js';
import { searchIcon } from '@cds/core/icon/shapes/search.js';
import { cogIcon } from '@cds/core/icon/shapes/cog.js';
import { codeIcon } from '@cds/core/icon/shapes/code.js';

ClarityIcons.addIcons(infoStandardIcon, searchIcon, cogIcon, codeIcon);
Now that we are loading the components and icons needed, let's jump to the CSS.
Setup CSS
Clarity provides layout, typography, and theme utilities that are standalone of the Web Components. These global styles make it easy to create complex page layouts and custom theming within the system.
Similar to JavaScript, Hugo Pipes can take care of loading and optimizing our CSS. At the top of our baseof.html file, we can see our global assets/index.css file be loaded onto the page.
{ $options := dict "config" "postcss.config.js" "noMap" true }
{ $style := resources.Get "index.css" | resources.PostCSS $options | resources.Minify }
<style>{ $style.Content | safeCSS }</style>
To process and optimize the CSS, Hugo uses PostCSS internally. This means we can leverage PostCSS plugins to optimize our CSS even further.
In the postcss.config.js file at the project's root, we are loading a plugin called PurgeCSS. This plugin allows us to tree-shake our CSS. For example, the Clarity global style utilities provide many options with only ~8kb of total compressed CSS. However, using PurgeCSS, we can further reduce this bundle.
const purgecss = require('@fullhuman/postcss-purgecss')
const atImport = require("postcss-import")
const pfm = require('postcss-font-magician');

module.exports = {
  plugins: [
    atImport(),
    pfm(), // copy @cds/city fonts to dist
    purgecss({ // css treeshaking
      content: ['./**/*.html'],
      defaultExtractor: content => content.match(/[\w-\/:@]+(?<!:)/g) || [],
      safelist: {
        standard: [/:host$/, /:slotted$/],
        greedy: [/cds-layout/]
      }
    })
  ]
}
Purge CSS works by processing the CSS selectors in the bundle and comparing those selectors against a list of HTML templates. PurgeCSS then can determine what CSS will be used at runtime and remove any unused CSS within that bundle.
This process, similar to JavaScript tree-shaking, will make our site even smaller and faster to load.
Web Component Design Systems like Clarity enables teams to choose the right tool for the job, whether a static site generator like Hugo or a Single Page App framework like Vue or Angular. Web Components and Hugo work great out of the box giving teams reliability and control of their web stack.


%20--%3e)
%20--%3e)
