Build JavaScript libraries with the Angular CLI
Cory Rylan
- 5 minutes
Building modern JavaScript libraries can be challenging. Modern JavaScript libraries need to build multiple bundles, one for ES5 browsers and modern es2015+ browsers. JavaScript libraries are also commonly built with TypeScript regardless if the users of the library use TypeScript. TypeScript provides type metadata in JavaScript libraries that code editors can use to provide improved autocomplete features. When creating JavaScript libraries, we also have to worry about performance, minification, tree shaking and more.
I wanted to see if there was any tool in the JavaScript ecosystem that can handle all of these responsibilities and aid building a JavaScript library. I have previously built Angular libraries with the Angular CLI and wondered if it would be possible to use the Angular CLI to build generic JavaScript libraries instead of Angular specific libraries. I found out not only is it capable but it works great!
In this post, I'll show an example library with some simple utility functions that we will publish to NPM and then use it in not only an Angular app but an React app.
Getting Started with the Angular CLI
To start creating our JavaScript library we first need to install a few tools. First, make sure to have the latest version of NodeJS installed on your machine. Once installed we can install the Angular CLI by typing the following command in our terminal/console:
npm install @angular/cliOnce installed we can use the CLI to create an Angular project that will contain a starter project. In our terminal/console at the directory, you want to create your project run the following command:
ng new my-appThis command will create a starter Angular project and install the necessary dependencies from NPM. Once completed we need to run one more command in the directory of our newly created Angular project:
ng generate library ts-exampleThis command will add a new library to our Angular project as well as the necessary dependencies. Once installed we can start creating our library.
Creating a JavaScript library
Now that we have our project set up thanks to the Angular CLI we can now build out our JavaScript library. To start, we need to run two separate commands in two separate command/terminals. First, we want to start watching our library code for changes:
ng build ts-example --watchNow anytime we make a change to our library code the CLI will rebuild and generate the new output of our library. Next, we need to start our CLI project to test our library.
ng serveThis command will start up our test Angular app at localhost:4200. With this, we can import our library code into our Angular application.

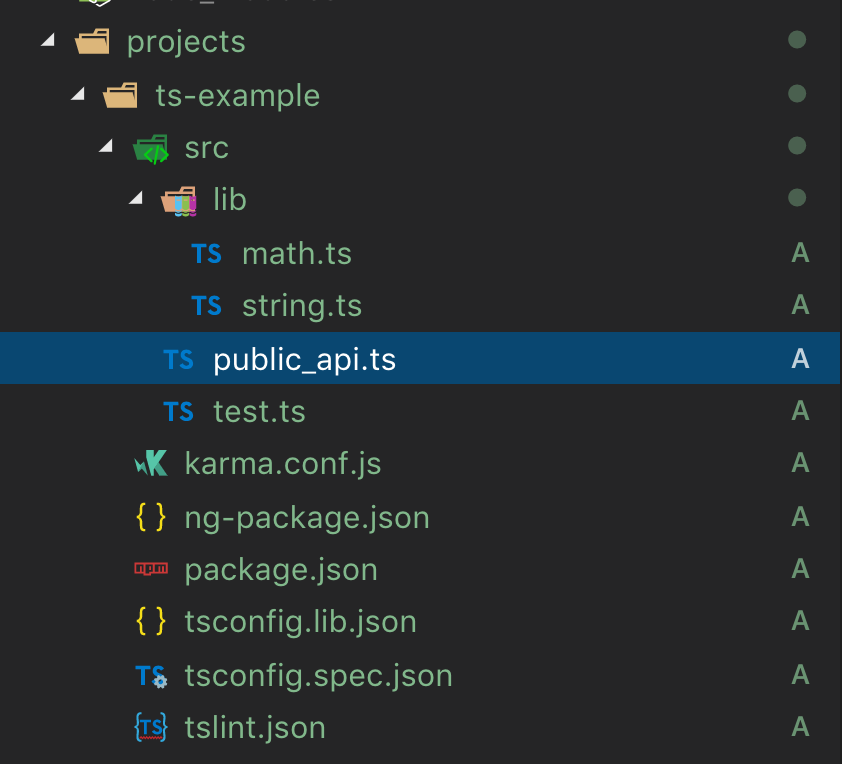
In the ts-example library we removed the Angular specific files and instead added a couple of files for the utility functions we would like to share as a library. First, let's take a look at the math.ts file.
export function add(num1: number, num2: number) {
  return num1 + num2;
}
Our example is a simple add function to demonstrate how we can import this code as a library for our applications. To make sure this code is bundled into our library we need to make sure we add it to the public_api.ts file:
/*
 * Public API Surface of ts-example
 */

export * from './lib/math';
Any files we want to be available for our library must be imported in the public_api.ts for the Angular CLI to build. Going over to our Angular site project we can now test our library code in the app.component.ts.
import { Component } from '@angular/core';
import { add } from 'ts-example';

@Component({
  selector: 'app-root',
  template: `
    <p>Number {{number}} calculated from TypeScript library</p>
    <button (click)="add()">add</button>
  `
})
export class AppComponent {
  number = 0;
  count = 10;

  add() {
    // simple but shows that we are using a function from a TypeScript library
    this.number = add(this.number, 1);
  }
}
The Angular CLI uses the TypeScript config to map our local copy of our library to an import ('ts-example') and make it immediately available to our local Angular app without publishing to NPM. So our library is working locally but what if we want to use it in a different project, say a React application?
Publishing a JavaScript library to NPM
Once we have built and tested our TypeScript/JavaScript library, we can publish it to NPM for other projects to use. In our ts-example library we need to add a package.json file to define information about our package name and version. To create the package.json file run the following command in the root directory of the ts-example project.
npm initFollow the prompts to initialize your package, make sure to choose a package name that is unique or scoped to your user. Once created we can build our library for publishing by running the following command:
ng build ts-exampleNow that we built our project we can publish our package. The CLI should have generated a directory at dist/ts-example. This directory has everything we need to publish the package including the JavaScript bundles and TypeScript definition files for TypeScript users. In the root of the newly created dist/ts-example directory we can run the following command to publish to NPM:
npm publishOnce published we can use our package in other projects. In our next example, we can import our library into a ReactJS application. Using Create React App or Stackblitz we can install our package to the project by running
npm install ts-example --save
Remember to use your given package name you defined in your package.json or use @coryrylan/ts-example if you want to try a working example. Once installed we can import our package into our app.
import React, { Component } from 'react';
import { render } from 'react-dom';
import Hello from './Hello';
import './style.css';

import { add } from '@coryrylan/ts-example';

class App extends Component {
  constructor() {
    super();
    this.state = {
      name: 'React'
    };
  }

  render() {
    return (
      <div>
        <Hello name={this.state.name} />
        <p>Start editing to see some magic happen :)</p>

        <p>{add(1, 2)}</p>
      </div>
    );
  }
}

render(<App />, document.getElementById('root'));
Find a working example of our React app using a TypeScript library built by the Angular CLI here on Stackblitz
Find the full Angular CLI project in the demo link below as well as an additional library example using Web Components with the Angular CLI!

