

Multi-Color 3D Prints with Simplify 3D
Cory Rylan
- 3 minutes
With 3d printing, we can use multiple colors by pausing at distinct layers and swapping the filament. Some 3d printer software has this feature out of the box, while others take a bit of work to configure.
I recently made a complex print that required several different color layers. This model was a map of the Walt Disney World Magic Kingdom Park.

To achieve this look, I needed to pause my print at specific layers and change the filament color and then resume. I use a Creality Ender 3 v2 and Simplify 3d as my slicer software.
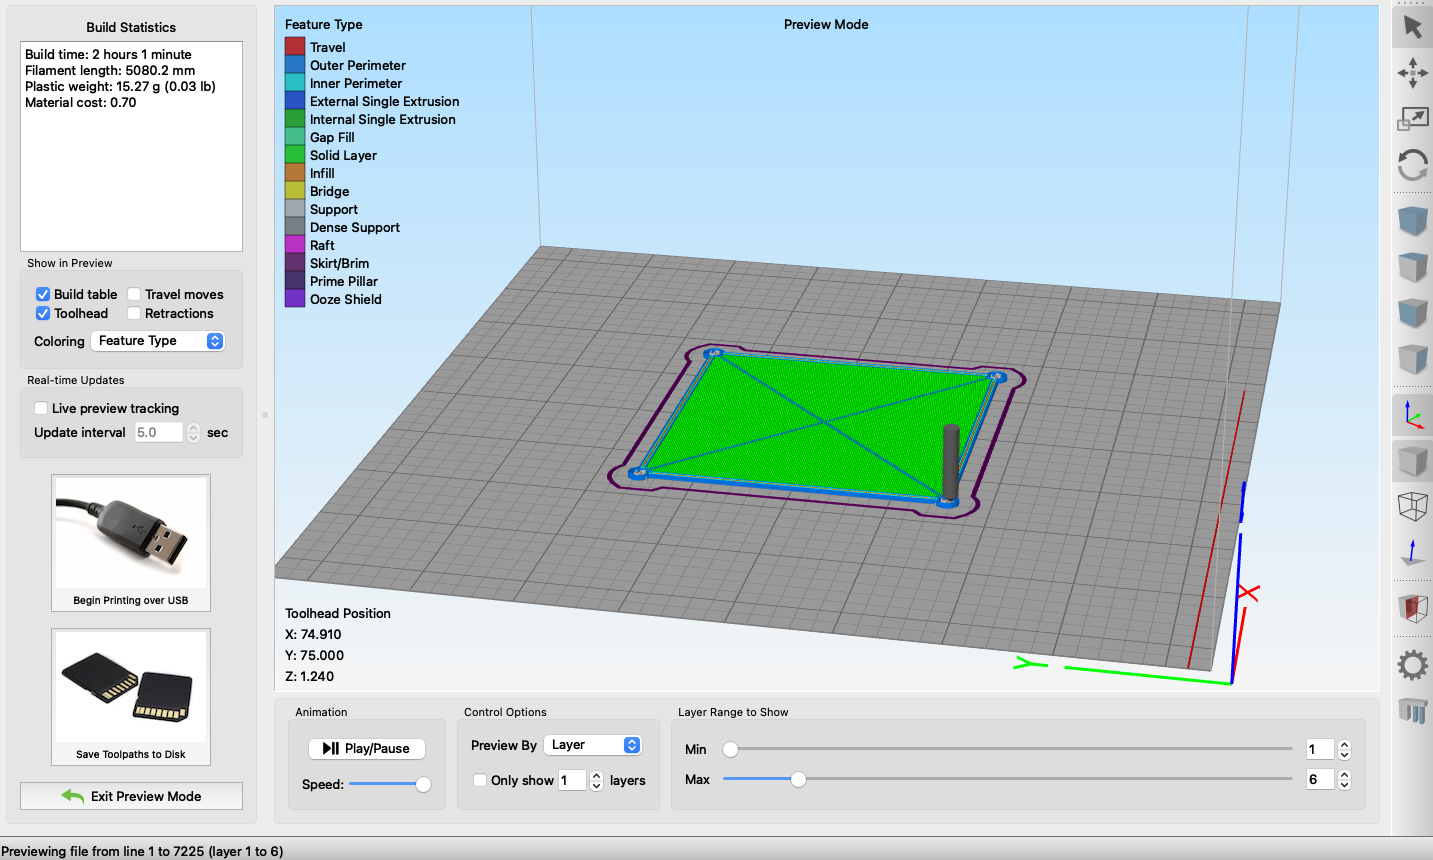
When starting your print, dial in your desired quality settings and then choose "prepare to print." Simplify 3d will slice your model into the layer to be printed. You will see a preview of the steps the printer will take to print your model.
At the bottom, select "Preview by" and choose the "Layer" option. This setting will allow you to use the range slider to see each layer number for the print. In addition, this preview step will enable you to determine which layers you want to pause your print.
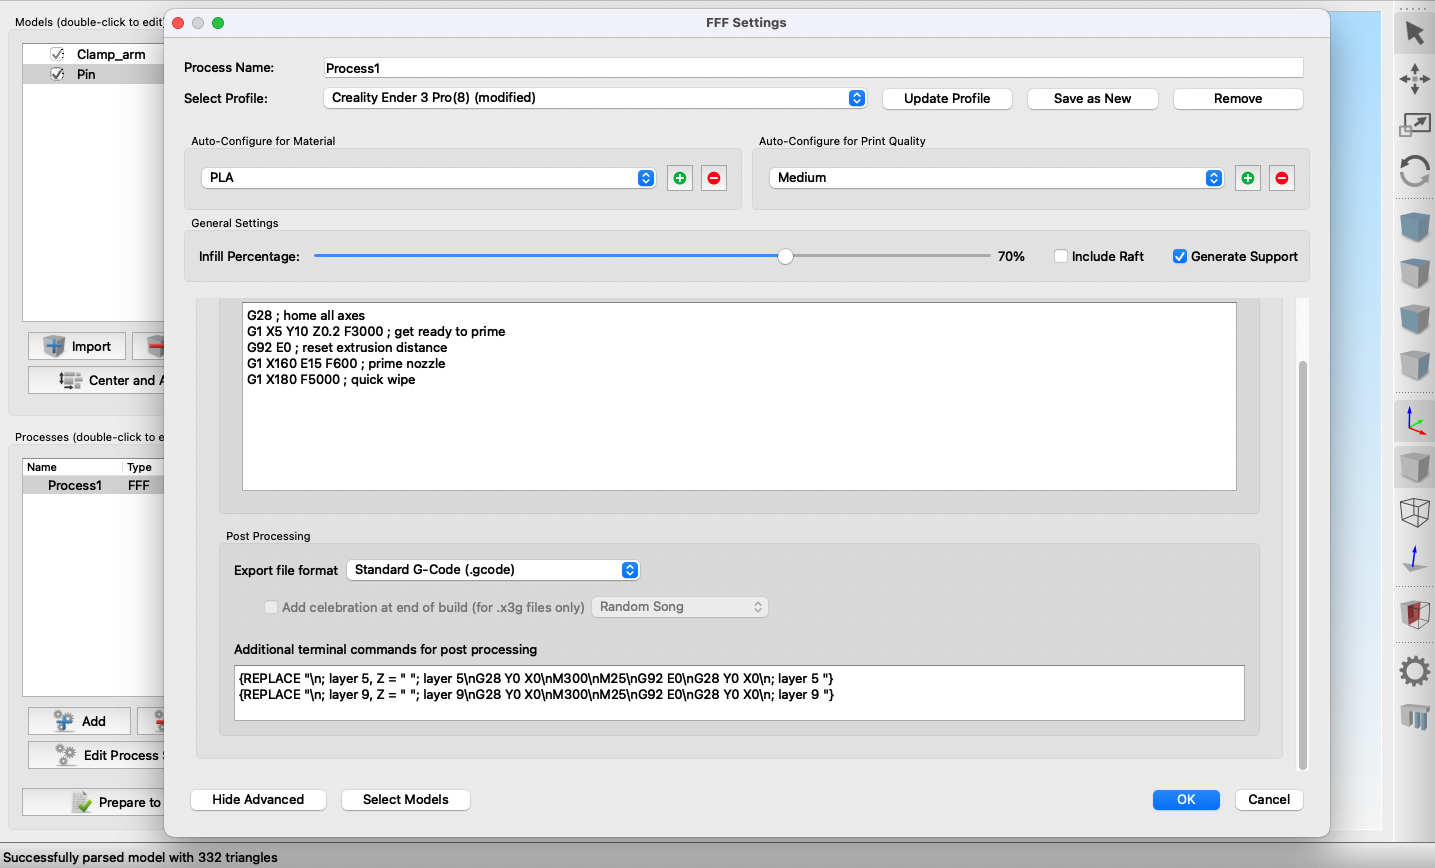
Once you have determined all your stopping layers, return by clicking "Exit Preview Mode." Next, click "Edit Process Settings" and then choose the "Scripts" tab option.
Under the scripts option will be a textbox labeled "Additional terminal commands for post processing." In this text area, you will paste the scripts necessary to tell your Ender 3 to pause.
A single pause command at layer 5 would look like this:
{REPLACE "\n; layer 5, Z = " "; layer 5\nG28 Y0 X0\nM300\nM25\nG92 E0\nG28 Y0 X0\n; layer 5 "}To add additional layers to pause, create a new line with the same command but replace 'layer 5' with 'layer LAYER_NUMBER_TO_PAUSE'. This example would pause at layers 5, 9, and 11.
{REPLACE "\n; layer 5, Z = " "; layer 5\nG28 Y0 X0\nM300\nM25\nG92 E0\nG28 Y0 X0\n; layer 5 "}
{REPLACE "\n; layer 9, Z = " "; layer 9\nG28 Y0 X0\nM300\nM25\nG92 E0\nG28 Y0 X0\n; layer 9 "}
{REPLACE "\n; layer 11, Z = " "; layer 11\nG28 Y0 X0\nM300\nM25\nG92 E0\nG28 Y0 X0\n; layer 11 "}
For the Ender 3, this script will make an audible beep and return to the home coordinates when paused. When changing the filament, be sure to extrude any excess filament from the prior material color before resuming the print. And that's it! Now set your print settings and print your multi-color model!


%20--%3e)
%20--%3e)