

Flow Charts with CSS Anchor Positioning
With the introduction of the CSS Anchor Position API in Chrome 125, it's never been easier to position an element relative to another element. This is a great way to manage complex positioning use cases like popovers and tooltips.
However, CSS Anchor Positioning can be used for more than just popovers and tooltips, it can be used to create basic flow chart diagrams. In this post we will learn how to use CSS Anchor Positioning to create flow charts and diagram with just CSS.

This post won't cover the full Anchor Positioning API. To learn more about the CSS Anchor Positioning API in depth check out the Chrome Dev blog post Introducing the CSS anchor positioning API.
Basic Positioning
CSS Anchor Positioning is a great way to position an element relative to another element.

To create our first anchored element we need to provide a name to div "one" so we can reference it. Anchor names must be unique and start with two dashes --.
.one {
  anchor-name: --anchor-one;
}
Next we need to provide the anchor positioning for div "two." We will use anchor(--anchor-one top) to position div "two" relative to the top of div "one."
.two {
  position-anchor: --anchor-one;
  bottom: anchor(--anchor-one top);
  justify-self: anchor-center;
}
We assign the div "two" bottom position to the top of div "one" using anchor(--anchor-one top). We also use justify-self: anchor-center to center div "two" horizontally relative to div "one." We can position any side of dive "two" to any side of div "one" using the same syntax (top, left, bottom, right).
Multiple Anchors
With CSS Anchor Positioning we can anchor an element to two other elements at the same time.
Just like div "one" we assign an anchor name to div "two" for our new third div to reference.
.one {
anchor-name: --anchor-one;
}
.two {
anchor-name: --anchor-two;
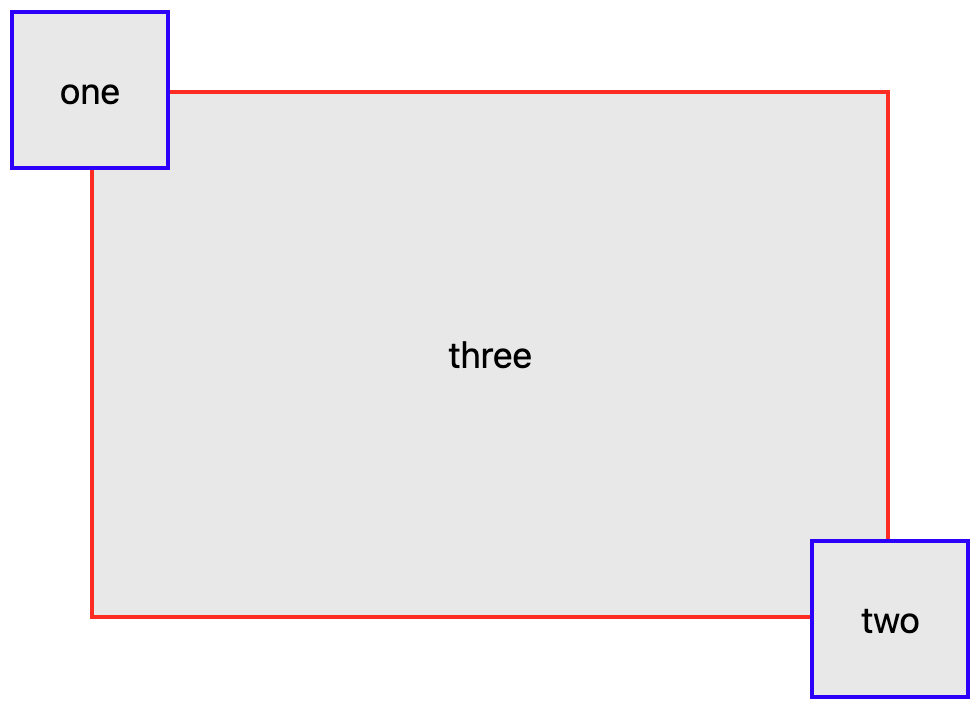
}The third div can now reference anchors one and two for positioning. To position div "three" to the center of both divs "one" and "two," we use the anchor() function for each side of the element. We can position any side of div "three" to any side of either div "one" or "two."
In this instance we are using center instead of a side to position relative to. This creates a overlap effect for the anchors.
.three {
  top: anchor(--anchor-one center);
  bottom: anchor(--anchor-two center);
  left: anchor(--anchor-one center);
  right: anchor(--anchor-two center);
}
Basic Flow Chart Nodes
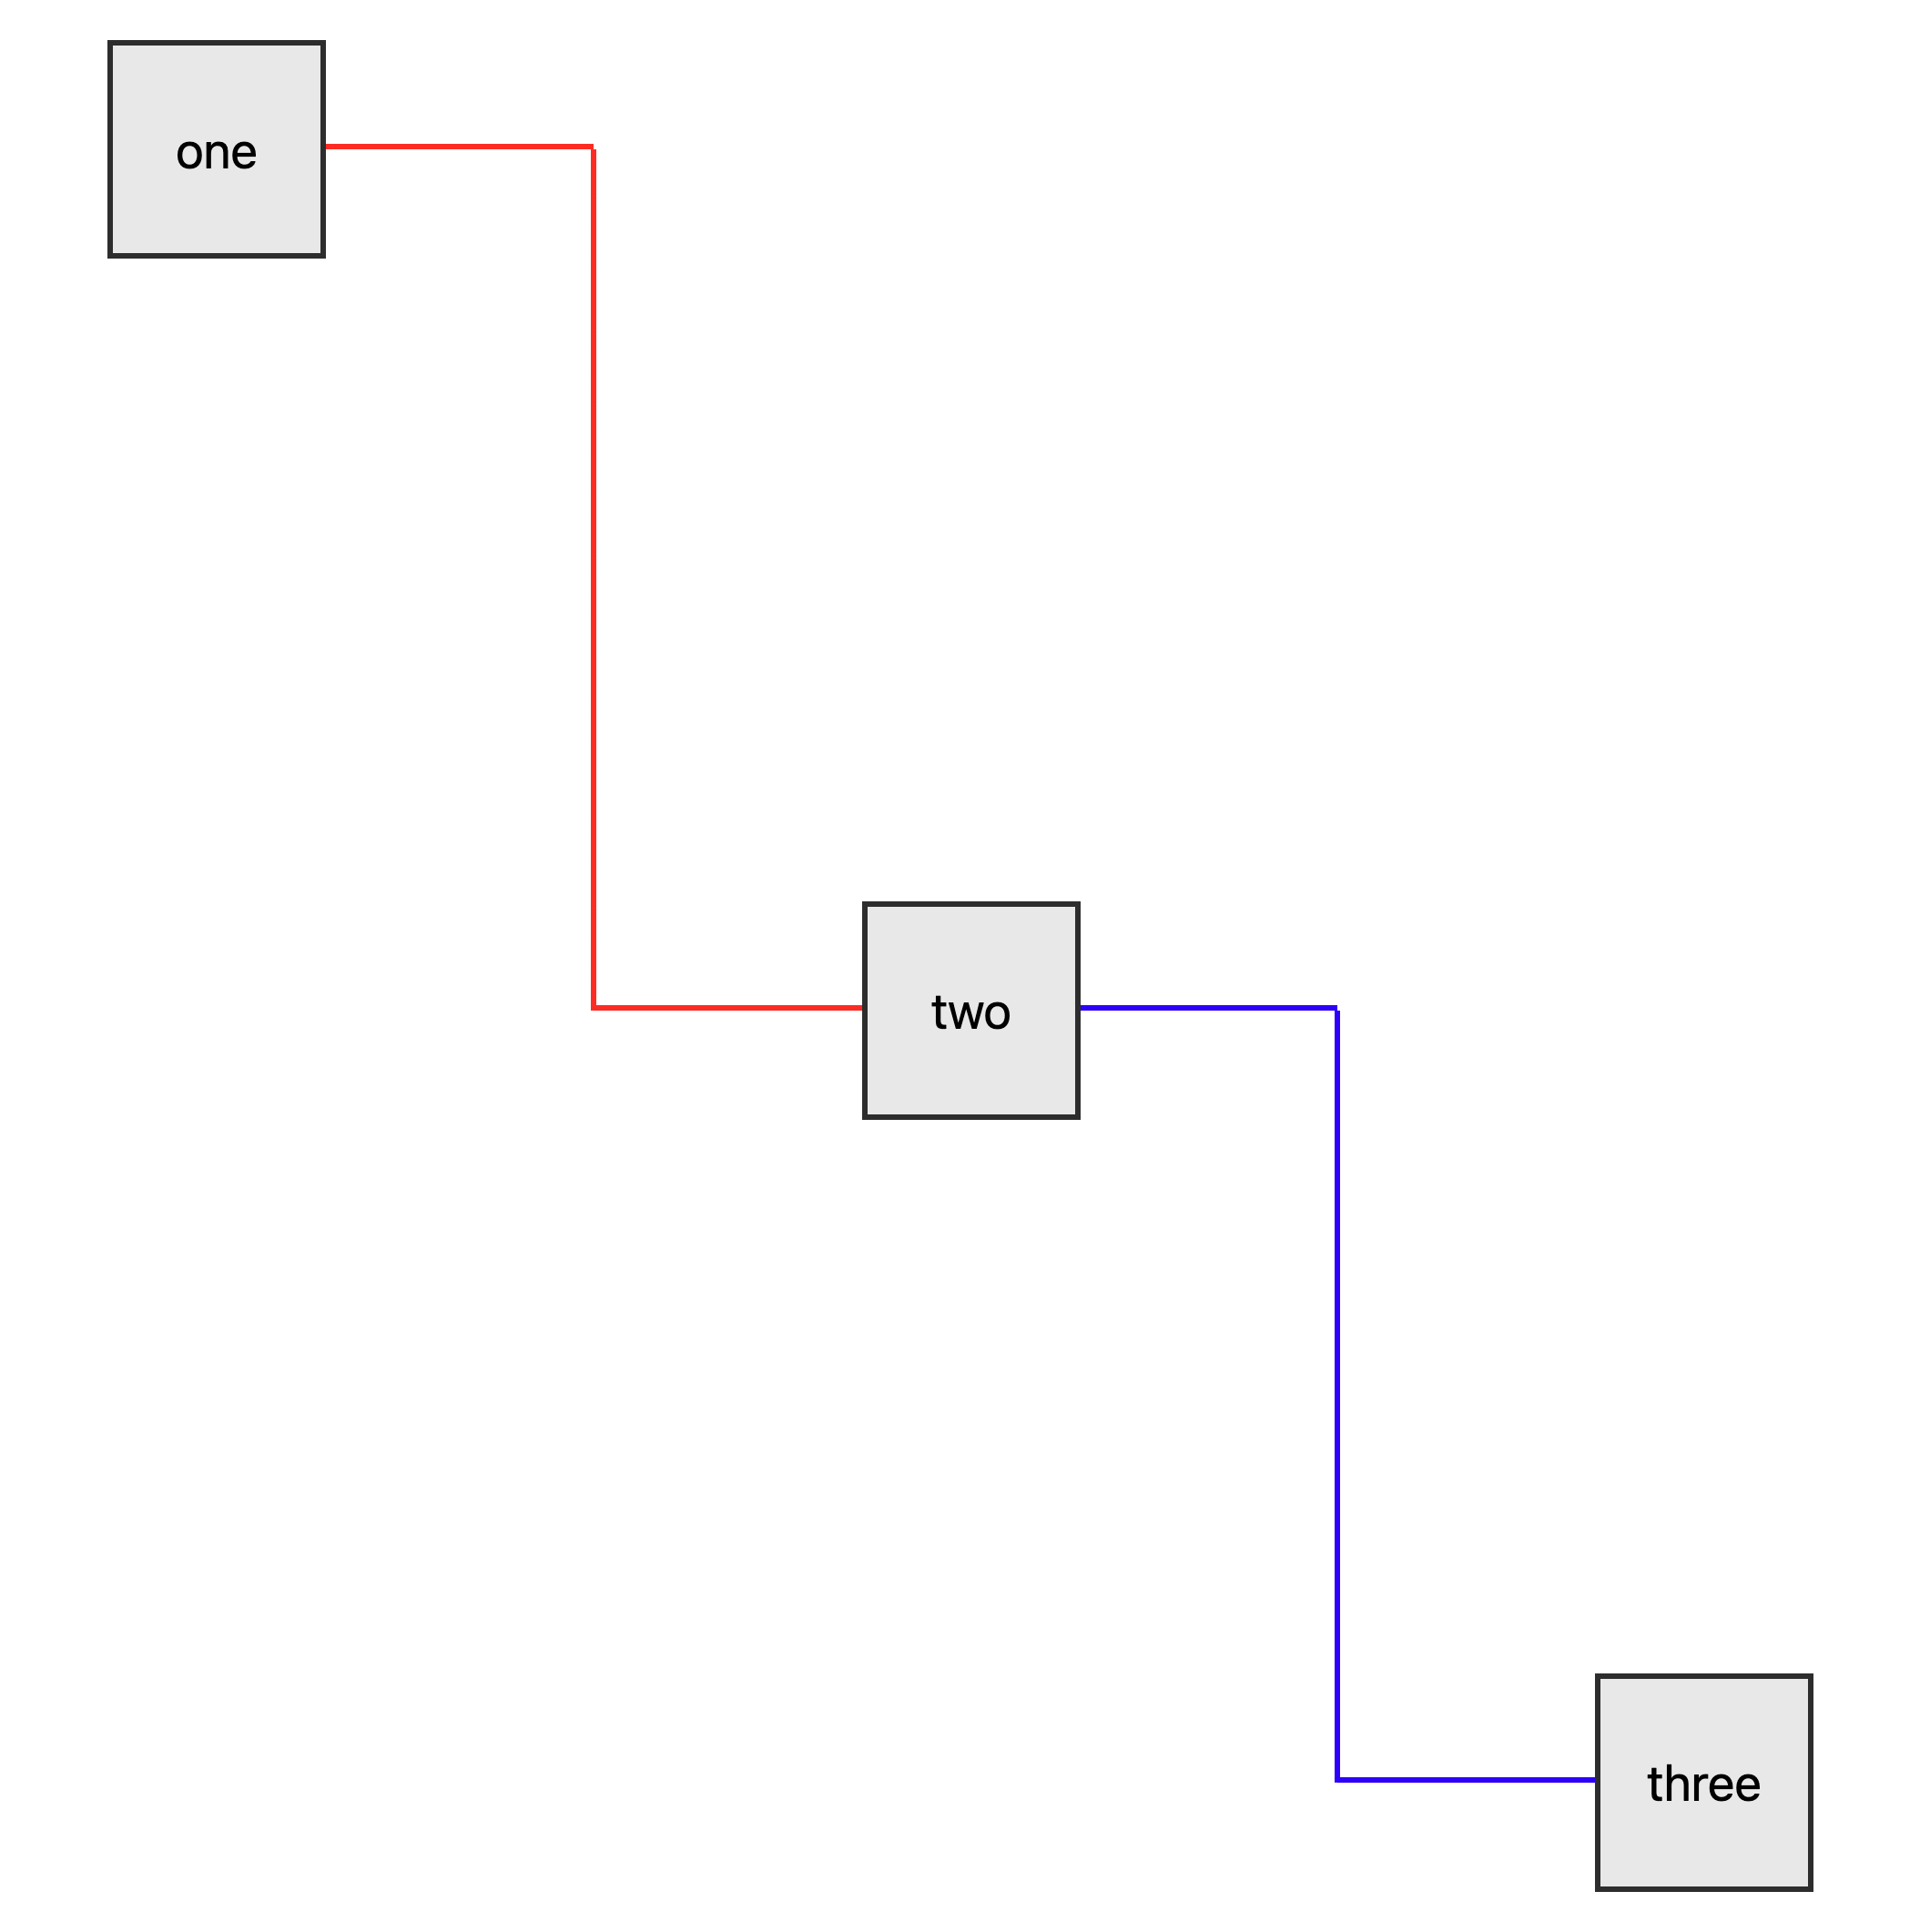
Using what we learned with anchor positioning we can create a basic flow chart.
Using the same technique by anchoring an element between two nodes we can create a flow chart like effect with some additional CSS tricks.

For the third div we can change the background color to use a background gradient to create a line effect in the middle of the div.
.line {
  anchor-name: --line;
  top: anchor(--one center);
  bottom: anchor(--two center);
  left: anchor(--one center);
  right: anchor(--two center);
  position: absolute;
  z-index: -1;
  background: linear-gradient(#2d2d2d, #2d2d2d) no-repeat center/2px 100%;
}
Now that we have the centered positioned line, we can use CSS pseudo elements to create the arrow head on each side of the line.
.line::before {
  position: fixed;
  display: block;
  content: '';
  background: #2d2d2d;
  height: 2px;
}

.line::before {
  bottom: anchor(--one center);
  left: anchor(--one right);
  right: anchor(--line center);
}
Then again with a CSS pseudo element on the other side of the line.
.line::before,
.line::after {
  position: fixed;
  display: block;
  content: '';
  background: #2d2d2d;
  height: 2px;
}

.line::before {
  bottom: anchor(--one center);
  left: anchor(--one right);
  right: anchor(--line center);
}

.line::after {
  bottom: anchor(--two center);
  right: anchor(--two left);
  left: anchor(--line center);
}Multiple Node Flow Chart
This approach can be expanded on by providing additional nodes and chaining the anchors. However when we add additional lines we need to flip the line directions depending on the nodes relative position to the anchor. The CSS position-try-options allows a easy way to declare fallback positions to use if the element can't be rendered within the provided space relative to the anchor.
.line {
  position-try-options: flip-block, flip-inline, flip-block flip-inline;
  ...
}
Draggable Flow Chart
Using a bit of JavaScript we can make our node elements draggable and create a draggable flow chart.


%20--%3e)
%20--%3e)
'%20points='107.644,470.877%2074.633,100.62%20437.367,100.62%20404.321,470.819%20255.778,512'/%3e%3cpolygon%20fill='hsl(18,%2086%25,%2055%25)'%20points='256,480.523%20376.03,447.246%20404.27,130.894%20256,130.894'/%3e%3cg%3e%3cpolygon%20fill='%23EBEBEB'%20points='256,268.217%20195.91,268.217%20191.76,221.716%20256,221.716%20256,176.305%20255.843,176.305%20142.132,176.305%20143.219,188.488%20154.38,313.627%20256,313.627'/%3e%3cpolygon%20fill='%23EBEBEB'%20points='256,386.153%20255.801,386.206%20205.227,372.55%20201.994,336.333%20177.419,336.333%20156.409,336.333%20162.771,407.634%20255.791,433.457%20256,433.399'/%3e%3c/g%3e%3cg%3e%3cpath%20d='M108.382,0h23.077v22.8h21.11V0h23.078v69.044H152.57v-23.12h-21.11v23.12h-23.077V0z'/%3e%3cpath%20d='M205.994,22.896h-20.316V0h63.72v22.896h-20.325v46.148h-23.078V22.896z'/%3e%3cpath%20d='M259.511,0h24.063l14.802,24.26L313.163,0h24.072v69.044h-22.982V34.822l-15.877,24.549h-0.397l-15.888-24.549v34.222%20h-22.58V0z'/%3e%3cpath%20d='M348.72,0h23.084v46.222h32.453v22.822H348.72V0z'/%3e%3c/g%3e%3cg%3e%3cpolygon%20fill='%23FFFFFF'%20points='255.843,268.217%20255.843,313.627%20311.761,313.627%20306.49,372.521%20255.843,386.191%20255.843,433.435%20348.937,407.634%20349.62,399.962%20360.291,280.411%20361.399,268.217%20349.162,268.217'/%3e%3cpolygon%20fill='%23FFFFFF'%20points='255.843,176.305%20255.843,204.509%20255.843,221.605%20255.843,221.716%20365.385,221.716%20365.385,221.716%20365.531,221.716%20366.442,211.509%20368.511,188.488%20369.597,176.305'/%3e%3c/g%3e%3c/g%3e%3c/g%3e%3c/switch%3e%3c/svg%3e)